
Understanding this graph will help you succeed as an asset manager
The Kash Curve & Asset Management
In understanding and accounting for the Kash Curve, asset managers are much more likely to succeed.
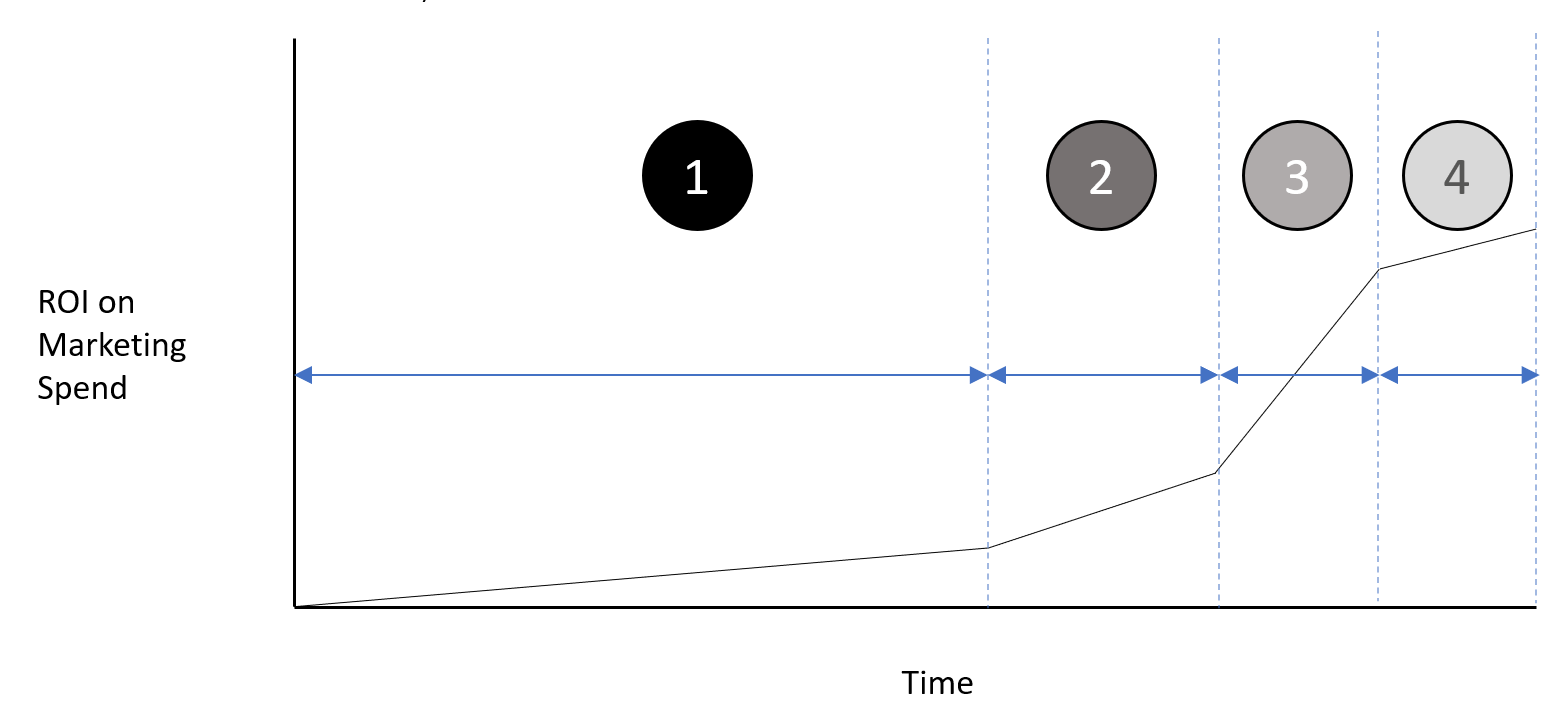
KILL ZONE
Asset managers underestimate the investment and time it takes to start seeing notable results.
Best be prepared for this reality when launching a fund. It is going to take longer and cost way more than anticipated. The more an asset manager is aware of and plans for this, the greater chance they have at surviving.
SURVIVAL ZONE
It is at this time an asset manager will start to see marginal results from marketing.
The greatest mistake an asset manager makes in launching a fund is believing the process starts here, and not developing the mental fortitude, allocating the budget, or accounting for the time it takes to survive the kill zone.
REWARD ZONE
If performance is good enough and the asset manager has stayed in the fight, this is when they are rewarded for the effort.
Again, don’t underestimate the budget, time and energy it takes to reach this zone.
GROWTH ZONE
The excitement of the reward zone eventually fades, and the asset manager is in the fight.
The ROI on marketing decreases slightly, however, the effort to market does not.
By Kyle Dunn